 If you have a website, you will likely sometimes need to do a 301 redirect.
At first it can seem scary, and there are a lot of tutorials out there that does not help – often they are technical and make it overly complicated.
It does not have to take any special technical skills to do a 301 redirect. In this article I will show you step-by-step how to do 301 redirect easily and without having to have any special skills.
What is a 301 redirect and when to use it?
A 301 redirect is a redirect of a URL (page or post) on your website to another URL on your website. It just simply means that if you have a certain URL that is no longer needed, you can redirect it to another page on your website, so if people click a link to that page, they will be taken to the new page instead of getting an error.
This is very important for the user-experience and also has some effect on Search Engine Optimization (SEO).
Imagine you have a good article on your website, but for some reason it is outdated or not relevant. You therefore want to delete it. There might however already be many other websites linking to that amazing piece of content of yours, or people that have shared it on social media.
If you just delete it, people that now click these links will come to an error page saying that the page no longer exist (also called a 404 error page). This means you will potentially lose visitors (and customers) to your website. And you can also lose the SEO benefit these links have given to your site.
Therefore, you should never just delete a page on your website without doing a redirect to a new page, so people will still get to a relevant page.
So you can use a 301 redirect when you delete content and then want to forward any incoming traffic to that content to a new page instead.
It can also be because the URL has a name that does not make sense, and you want to change the URL itself, but keep the content on the page – then you also need to do a redirect. You cannot just change the URL without telling the new URL people should be directed to instead.
These are the most common reasons for a normal webmaster to have to do redirects. There can be other reasons that are more technical, but since this is the one that most website owners at some point need to do, I will focus on how to do this kind of redirect, as it can be done a lot easier than most people explain.
Do you need access to FTP?
Before getting to how you can set up redirects, I just want to mention the use of FTP.
If you have looked into doing a 301 redirect, you will probably have read a lot about that you have to have access to a FTP client like FileZilla.
This is definitely a good way to get access to the htaccess file, where you have to set up the redirect. However, if you are not so technical, it can be difficult to find out how to use it, and it can be difficult to get the information you need from your host to be able to use FileZilla.
You actually do not need to use FTP to do a redirect. And you also do not need to install an extra plugin, if you use WordPress.
If you have a normal and well-functioning WordPress website, you can very easily create a redirect with what you have on the site, as I will show you below.
Warning before doing a redirect?
 Before we start, I just want to mention that even though you after reading this article will know how to do a 301 redirect, it is good to be critical about when you use it.
Before deleting any pages or content on your website or changing a URL, so you need to do a redirect, ask yourself if you really need to delete or change it.
Sometimes you can just give your old content a makeover, and that can increase you rankings. Or the name of the URL might be ok after all. So do not just start deleting pages and links and changing URLs all the time.
Only delete content or change URLs, if you have to. For example if you find out you have two articles that are too similar. Then incorporate the content into one page and do a redirect from one of the articles to the other. Or if your content is really outdated and you do not see the point in updating it – then do a redirect when you delete it.
Also, if you are getting a new design of your website, you will often get a new URL structure. In this case you need to make sure to do redirects from all old URLs to the new ones.
So there are very good reason to use 301 redirects, but do not exaggerate and do it just for fun. Use it when it is necessary.
How to set up 301 redirect easily (step-by-step)
This step-by-step tutorial will show you how easy it is to do a 301 redirect on a WordPress website. As mentioned before, you do not need any special skills, access to FTP, or any extra plugins to do this.
I have made a short video that shows you all the steps. You can also read all the steps below the video, if you prefer this.
Step 1 – Activate access to .htaccess file
The htaccess file is where you will need to set up the 301 redirect. Do not worry about it, if you do not know what it means. You do not need to know that to be able to do a redirect.
When you have a WordPress website, you will very likely have installed the All in One SEO plugin, or one of the most known SEO plugins called Yoast plugin.
If you do not already have one of these plugins installed, you definitely should. To have one of them installed is a must for any WordPress website, as it can help you with SEO without you having to do any of the technical stuff.
What many people are not telling you is that you can get access to your .htaccess file through either of these plugins.
It is amazing, as you can then do a 301 redirect without FTP and without having to install a plugin only for redirects that many others will use, and keeping the number of plugins to a minimum can make your website faster.
Below I will show you where you find the file through these two SEO plugins, so you can get access no matter which one you use.
Get access through All in One:
If you use the All in One SEO plugin, you need to first activate access to your htaccess file.
In the WordPress dashboard, you can see an All in One SEO tab. Hover over it and click “feature manager”. Now you will get the option to activate several extra tools. Here you find the “file editor” and activate it.
In All in One SEO plugin, you have to activate the file editor.
You will now have an extra sub menu option under the All in One SEO options called “file editor”.
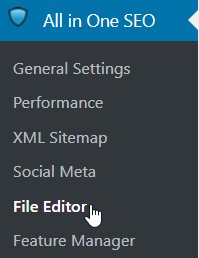
When you click this, you will get access to the .htaccess file. But do NOT change anything until you have read the next steps.
Get access through Yoast:
It is also easy to get access to the .htaccess file through Yoast. You just click the Yoast logo in your WordPress dashboard menu. Now choose the sub menu item called “Tools”. You will now see a screen with a few different options.
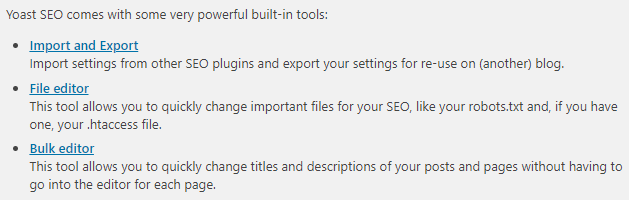
In Yoast you find the htaccess file throug the “Tools” menu.
Here you click “file editor” and you will now have access to the .htaccess file. Again do NOT make any changes yet.
Step 2 – Make copy/backup
Before making any changes in the file editor, it is a good idea to have a backup. It is easy and is not dangerous, but it is in general always good to have a full backup of your website.
If you make a mistake the website can however be messed up, and that is why some people prefer doing this through FTP. So if you use this method, make sure to have a backup. It is always best practice to have a full backup before making any bigger changes.
So to be on the safe side, make sure to have a full backup of your website. Your host might do that automatically – I for example have Wealthy Affiliate as a host, and a backup of my website is automatically created every night. If your host does not do this, you can for example do it with a plugin like BackWPup.
Also, there will probably already be something in your .htaccess file, when you enter it whether you do it through All in One or Yoast. It will look something like this as a standard.
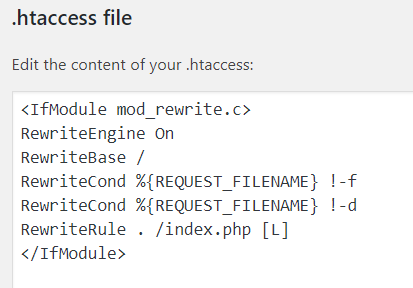
A standard .htaccess file.
It is a good idea to just copy this into a notepad document or similar. If anything should go wrong, you can put this code back instead.
Step 3 – Insert the redirect
To do the redirect, you of course need to know what the URL you want to redirect is, and the URL of the page you want to redirect it to.
So let’s say you have an article on the URL https://yourdomain.com/article-1 and you want to redirect this to another article called https://yourdomain.com/article-2.
To do this, you need to insert the following code at the top of the .htaccess file (of course change it to the URLs you want to redirect from and to):
# User added 301 redirects
Redirect 301 /article-1 https://yourdomain.com/article-2
# End user added 301 redirects
it will then look like this:

The htaccess file after the redirect has been added.
So the code is basically saying that if somebody goes to the URL for article one, they will be redirected to article 2.
If you want to do more than one redirect, you just need to add it to a new line in between the #user added 301 and #end user added 301.
Step 4 – Save and check
Once you have put in the redirects you need, you click “update .htaccess”. Now the redirect should work.
But just to be sure, go to your website and write the URL of the old URL and test, if it takes you to the new one.
Final thoughts
That is how easy it is to create a 301 redirect in WordPress without any extra plugins and without having to use FTP.
I used to use FTP as well, and in some ways it is safer, as you can easily just upload the old .htaccess file, if anything should go wrong. This method is however a lot easier – but as a disclaimer I have to remind you again to make sure you have a full backup of your website and a copy of your .htaccess file, as it was before you made any changes.
This method has especially been useful for me for clients’ websites, where I sometimes have access to the WordPress dashboard but not the hosting info. Then this saves a lot of time not having to try to get access through FTP.
But it is also the method I am using on my own websites, where I have access to all the hosting info, because it is just very easy to do, once you know the code to put in, and when you know how to adjust it to make the redirect you want to.
So now it is over to you, so you can do the redirects you have to, and you now know you can can do it in just a few minutes.
If you have any comments or questions, feel free to leave a comment below. Also, feel free to drop a line, if you found this tutorial helpful.


Thanks for this handy little post. I’ve been wondering whether this could be achieved without having to add another plugin to my already ‘plugin-rich’ website!
I’m wanting to change the title of my indexed post but I’m concerned whether changing the URL would effect my Google ranking.
After reading this, I’m sure I’m able to change the title and URL of the post as long as I do a 301 direct. Thanks for the informative read.
You are welcome Teresa.
Just be aware that just because you might want to change the title of your posts, you do not necessarily have to change the URL. It is only necessary to change the URL, if it really does not make sense, or if you need to change the structure.
But glad my post helped you and could show you it does not have to be difficult to do a 301 redirect.
Mikael